Glaze decorations. Assortment, preparation technology and application. Using frosting to decorate a cake Frosting for mousse cakes
Lipstick jewelry. These finishing semi-finished products are used to cover the surface of products.
Before use, the lipstick is heated to a temperature of 50-55°C in a water bath. It becomes fluid, which is necessary for glazing products. Before applying lipstick to a biscuit or sand layer, you must first lubricate it with a thin layer of fruit filling, then the lipstick will lie in an even layer and be more glossy.
Apply lipstick quickly with a long knife and level it over the entire surface of the layer. When the lipstick has hardened, the layer is cut into pastries or cakes with a thin hot knife, for which it is dipped in hot water. This is done so that when cutting the layer, the lipstick does not crumble, but melts.
Sometimes lipstick is used to make designs in the form of a grid or dots. To do this, dress up the lipstick, put it in a cornet, close it and apply the desired design.
You can use lipstick to make a marbled or herringbone pattern. For this purpose, a small amount of lipstick is tinted in a darker color; cocoa powder is often used. The lipstick is placed in a cornet. Decoration must be done quickly so that the lipstick does not harden. A layer of lipstick is applied to the layer, and immediately lipstick of a different color is deposited from the cornstick in the form of parallel lines. And then, with the blunt side of a knife, draw lines across up and down (you get a “marbled” pattern) or in one direction (a “herringbone” pattern).
Glaze decorations.
The following glazes are used for finishing products: raw for glazing the surface; raw and custard for decorating products; chocolate (couvergur).
Raw glaze for surface glazing
Powdered sugar 907, egg whites 28, water 136. Yield 1000.
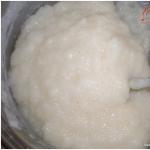
Egg whites and water at a temperature of 35-40°C are poured into the beater, 1/3 of powdered sugar is added and, while beating at low speed, another 1/2 of powdered sugar is added according to the recipe. The mixture is heated to 40-45°C. Beat again on low progress, gradually adding the rest of the powdered sugar. The glaze resembles the consistency of thick sour cream. The surface of the products is covered with this glaze. After hardening, a smooth, shiny thin sugar crust forms on the surface. Just like lipstick, it can be tinted in different colors.
Raw glaze for decorating products
Powdered sugar 866, egg whites 169, citric acid 0.1 Yield 1000.
Egg whites are poured into a whipping kettle without traces of fat, the machine is turned on at low speed and, while beating, powdered sugar is gradually added, and at the end of beating, citric acid is introduced. Readiness is determined by a stable pattern. Decorate the products with glaze, pipetting it from a pastry bag or paper cornstick.
Custard glaze for decorating products
Granulated sugar 547, powdered sugar 315, egg whites 170, citric acid 0.1, water 248. Yield 1000.
Bring sugar and water to a boil, remove the foam and boil to 114-115 "C (test for a “weak ball”). At the same time, beat the egg whites until a stable foam and until the volume increases 5-6 times. Without stopping whipping, gradually pour in the hot sugar syrup in a thin stream, add powdered sugar and diluted citric acid in parts.The total duration of whipping is 35 minutes.The readiness of the glaze is determined by the pattern on the surface: the pattern should not float.
Decorations made from custard glaze are less shiny than those made from raw glaze, but are more stable during storage.
Chocolate glaze (couvergur). Chocolate icing is used to glaze the surface of cakes. To do this, chocolate is crushed, combined with cocoa butter in a ratio of 4:1, heated in a water bath to 33-34°C and the surface of the products is glazed.
Kandir jewelry
Refined sugar 745, powdered sugar 74, water 224. Yield 1000.
Sugar is combined with water, brought to a boil, the foam is removed and boiled to 110C (test for a “thick thread”). The resulting syrup is cooled to 80°C, rubbed with a spatula, gradually adding powdered sugar. The mass becomes cloudy and acquires the consistency of liquid sour cream. Kandir is used for casting hollow figurines. The best figures are made from refined sugar, weaker ones - from granulated sugar.
For this purpose, plaster molds are used. The halves of the molds are washed, tied together and placed in water for 2-3 hours. The raw mold prevents the syrup from sticking to the walls.
Hot candir is poured into the prepared form through the hole located at the bottom of the figurine, after a few minutes a hard crust forms near the walls. After 10-15 minutes, the uncured candir is poured out and the mold is left for 30 minutes. Then it is untied, the resulting figurine is taken out and dried for at least a day. The figurine can be painted with food coloring or icing.
Chocolate desserts are heaven for those with a sweet tooth. Decorating with this sweet is almost a win-win option and is liked by all children and most adults. Chocolate decor looks impressive and tasty, and it’s easy to create: just melt the bar and pour icing over the top layer and edges of the cake. To create a more complex decoration, you will need different types of chocolate, a pastry bag, molds and other tools, but the main thing is accuracy and imagination.

Preparing the glaze
The cake, covered with smooth chocolate glaze, is worthy of the highest praise. This decor serves as the basis for drawings, fruit and cream compositions. You can get by with even minimal decor in the form of a few large nuts, pieces of chocolate and cinnamon sticks.

Filling with glaze
By the way
The mixture of cream and chocolate used to coat confectionery products is called ganache.
Ingredients:
- dark chocolate - 100 g;
- cream - 100 ml.

Recipe and preparation methods:
- Break the chocolate bar into small pieces.
- Bring the cream to a boil. It is better to take a fatty product.
- Add chocolate to cream, stir until completely dissolved.
- If you need a thicker glaze, then add a little chocolate, and vice versa, to make a liquid coating, pour cream into the mixture.
- Cool the cake before frosting it. The chocolate itself should be warm.
- The cake can be completely covered with icing. To do this, the mass is poured into the center and leveled with a spoon or spatula.
- Another way is to fill the center and let chocolate drip around the edges. To do this, you need to run a pastry bag along the edge of the cake, periodically stopping and pressing on the bag.
- Place confectionery beads, sprinkles, coconut flakes, protein cream elements, fresh or canned berries, fruits, nuts on the glaze.

Advice
If the ganache is cooled in the refrigerator, and then warmed to room temperature again and whipped, you will get a fluffy chocolate cream for layering and creating relief patterns using a pastry bag.
This is an original way to decorate a cake with your own hands.

You will need:
- white chocolate icing;
- melted dark chocolate;
- pastry bag;
- skewer.
How to draw a spider web:
- Cover the top cake with white frosting.
- Using a piping bag, draw several circles at equal intervals from the center.
- Use a skewer to draw several stripes from the center of the cake to the edges. The web is ready!
The frosting does not have to cover the entire cake. Chocolate can be beautifully poured in a thin stream onto the airy mass of whipped cream, protein or custard. The easiest way is to draw parallel lines, moving like a snake from one edge of the cake to the other.
Ordinary gelatin will help to achieve ideal smoothness of the chocolate coating.
Ingredients:
- powdered gelatin - 1 tsp;
- sugar - 210 g;
- water - 110 ml;
- cocoa powder - 65 g;
- dark chocolate - 50 g;
- heavy cream - 65 g.

How to cook:
- Pour gelatin with cold water (50 ml) and let it swell for 10 minutes.
- Mix cream, remaining water, sugar and cocoa powder. Grind the chocolate.
- Bring to a boil, add chocolate pieces. Mix everything until smooth.
- Stir in gelatin.
- Pass the mixture through a sieve and beat lightly with a whisk.
- Pour into an airtight container and leave in the refrigerator overnight.
- To cover the cake, heat the glaze to 35-45 degrees. If bubbles appear, strain the mixture through a sieve again.
- The glaze is distributed in a stream from the center in a spiral; it is better to place the cake on a stand with a tray for free drainage of the glaze.
The secret of an openwork pattern made of chocolate
Masterpieces of confectionery art are covered with fine melted chocolate. You can easily repeat this trick with your own hands; all you need is regular parchment paper.
What you will need:
- chocolate;
- parchment paper;
- pastry bag with a thin tip.

How to make a drawing:
- Break the chocolate into pieces and place in a water bath. Heat, stirring, and make sure that no steam or water gets into the pan, otherwise the chocolate will curdle.
- Cool the chocolate and pour into a pastry bag.
- You can draw directly on the cake - for this you need a smooth and uniform surface.
- To make an accurate and neat drawing, you should make a sketch on parchment paper.
- Outline the drawing with melted chocolate in a thin stream.
- Place the parchment in the refrigerator until the chocolate hardens completely.
- Separate the finished drawing using a thin knife and carefully transfer it to the cake. The composition is placed both in the center and on the sides, but in the second case a sticky coating will be required.

Chocolate chips
To decorate a cake beautifully in a few minutes, use chocolate and a grater. Both the central part and the sides are covered with shavings. A fine grater produces fine chocolate chips and dust; a coarse grater produces beautiful curls.
You will need:
- dark chocolate - 1 bar;
- chocolate candies or small pieces of chocolate (white can be used) - 2-3 pcs.;
- cinnamon - optional.

How to decorate a cake:
- The chocolate for grating should not be too warm, as it will quickly melt in your hands. But it is not recommended to freeze it, as its fragility increases.
- Grate half the tile on a fine grater.
- On a coarse one, chop the second half.
- Sprinkle the cake with coarse shavings along the edge of the cake.
- Fill the center with fine crumbs.
- Decorate with chocolates and strawberries. An effective technique is to dip the berry in melted white chocolate and sprinkle with grated cinnamon before placing it on the cake.
- Complete the composition with a whole cinnamon stick.
An unusual way to decorate a cake is to make chocolate leaves. They turn out just like the real thing, only edible.

You will need:
- small green leaves;
- brush;
- melted chocolate.
How to create decor:
- Rose leaves are suitable for decoration. They must be washed and dried.
- Melt the chocolate bar in a water bath.
- Using a brush, apply the mixture to the leaves.
- Place them in the refrigerator and wait an hour.
- Carefully remove the green leaves. Chocolate decor is used to frame the cake and as an element of the composition in the center.

Cocoa powder
The famous dessert tiramisu is decorated with cocoa powder. This product transforms the taste of cheese cream. It’s easy to decorate a cake with cocoa sprinkles at home.
What you will need:
- cocoa powder;
- strainer;
- stencils.

How to decorate a cake:
- Take a ready-made stencil or make it yourself from paper. Place on cake. If the top of the product is covered with cream, then the stencil should be held a little higher so that it does not stick and spoil the surface.
- Using a sieve, sift the cocoa powder over the stencil.
- Carefully remove the stencil. The drawing is ready.

What else goes with chocolate: design ideas
Simple and successful ways to decorate a cake with chocolate and store-bought sweets:
- On a New Year's cake, it is logical to place a figure of Santa Claus made of confectionery chocolate in the center. These are sold in grocery stores ahead of the holiday.
- Marshmallow candies will look good on a dark chocolate background. An interesting and modern ensemble of marshmallows and macarons will delight girls with a sweet tooth.
- The composition in the center of the cake can be made from ordinary marshmallows, breaking it into pieces and pouring melted chocolate on it.
- Idea: cover the cake on all sides with thick and sticky cream and place various candies in a dense layer. These can be simple treats from a set of candies or small Twix, Bounty and Kit Kat chocolates.
- Long cookies such as children's Bondi, long wafer rolls or Kit-Kat chocolates are used as sides. To keep the fences in place, they are tied with a decorative bow.
- If the sides of the cake are high enough, you can fill the center with colored dragees “Mmdems” or “Skittles” - this filling will delight the children.
- Chocolate dragees with a center of puffed rice or nuts are simply created to complement chocolate cream.
- Children will also love the marmalade figures on the chocolate dessert: bears, snakes or candied colored pieces with fruity taste and color.
- Cakes are often decorated with cookies. Use small crumbs, cute puff pastry “ears” or Oreo cookies. Whole Oreos are laid out in a circle, and the bottom edge of the cake is decorated with halves.
- How to assemble a chocolate hedgehog: cut out the cake layers into an oval shape with a point (there will be a nose). Cover the cake with frosting. Place soft round chocolates on the back. Form the nose and eyes from the darkest chocolate.
- Chocolate and coconut flakes make a delicious tandem. Raffaello candies will look especially beautiful on the chocolate layer.
- Colored inscriptions are clearly visible on the chocolate glaze. They are drawn from icing or cream.
- Don't forget about fresh berries and fruits, which are a welcome addition to any dessert. Almost everything goes with chocolate. Fresh berries are laid out next to the chocolate cream figures: raspberries, blueberries, strawberries. The fruits used are apples, peaches, pears, bananas, and pineapples.
- Nuts, especially whole hazelnuts, almonds and cashews, will complement the chocolate flavor. They are also added to the cream in the form of shavings and used for layering cakes. Confectioners add almond flour to creams. To do this, the nuts are simply crushed in a coffee grinder.
- Ordinary powdered sugar will also complement the design.
- The zest of citrus fruits: lime, lemon and orange will add a spicy note to the dessert.


Decorating a cake with chocolate is a fun activity, but a small mistake can easily ruin all your hard work. What you need to know about working with chocolate:
- Chocolate storage temperature is from +12 to +20 degrees.
- To prevent chocolate from becoming saturated with foreign odors, it is stored in airtight packaging.
- Don't forget about the expiration date. Do not use chocolate covered with white coating.
- If glaze or openwork patterns are created, then the chocolate is taken without fruits and nuts in the composition. And for decorating with chocolate pieces, a product with jelly filling, raisins and other additives is suitable.
- A very convenient device is a pastry bag with a variety of attachments. But if such an item is not available on the farm, they make it with their own hands. For this you will need thick paper. A cornet is rolled out of it and its edge is cut off.
- When melted, white chocolate forms sugar grains, so it is heated only in a water bath until halfway. The mass is brought to a homogeneous state by stirring.
- For melting, professional confectioners use a special chocolate dragee.
- Cognac or rum is added to chocolate cream as a flavoring.
- Cheap chocolate may not melt, so don't skimp when choosing a product.
- Any cream can be turned into chocolate by adding cocoa powder. It is preferable to take cocoa for cooking. Instant drinks do not have such a rich taste, and cheap substitutes are not always healthy. If you still use Nesquik, then you need to reduce the sugar content, since there is already a lot of it in the powder.
Chocolate is the most popular sweet, which means a cake decorated with sweets and chocolates will please everyone. It takes a little practice in creating unusual decorations, and on the festive table there will always be desserts that are in no way inferior in beauty to products from a confectionery shop. Perhaps, in the process of creating decor, original ideas will come to you, and a new recipe will appear in the cookbook.


Icing (“Royal Icing”) is a sugar-protein drawing mass that is used to make voluminous decorations for confectionery products. This mass can be white or colored when food coloring is added to it.
Icing is a fairly thick plastic mass obtained by grinding fresh egg whites with sifted powdered sugar with the addition of some acidifier for plasticity - lemon juice, dry citric acid, cream tartare, etc.

Icing is a protein drawing mass.
Sometimes, for greater plasticity, glucose syrup or a little glycerin is added to the mass, but the addition of glycerin can make the mass too sticky, which will complicate its subsequent detachment from the polyethylene backing. When depositing the mass directly onto the surface of the gingerbread to be decorated, i.e. when subsequent detachment of the icing lace is not expected, the addition of glycerin can significantly facilitate the work.

The correct consistency of icing for jigging it with a cornet.
To create icing decorations, there are drawing masses with a different composition - for example, based on albumin (1 kg of albumin replaces 316 chicken egg whites) and some others, which are more convenient not at home, but in industrial conditions.
NOTE FOR THE CURIOUS. Cremortartar is a tartaric salt of potassium acid C4H5O6K (the name comes from the Latin cremor - thick juice and the Latin tartarum - cream of tartar).
It is formed naturally from long-term storage of wine on the walls of barrels in the form of hard crystalline crusts, which are deposited as a result of fermentation of grape juice; obtained in mass quantities by chemical synthesis.
When combined with water, milk or vegetable juices, i.e. with any liquid mixed into the dough, cremortartar turns into a solution of tartaric acid and thereby promotes the germination of the dough. Therefore, cream tartare is an important component of baking powder (bakpulver), and can also be used independently, regardless of other rising agents (yeast or soda), in those types of dough where it is necessary to achieve particularly strong germination, for example, in puff pastry. Cremortartar can be replaced with other types of food acids: citric, malic, acetic.
1) Draw future patterns on paper or print ready-made templates. It is very convenient to use children's coloring books as templates.
2) Place a drawn paper template under plastic wrap or place it in a plastic “file” (a thin transparent bag for documents). Here we use the property of polyethylene that it does not stick to anything. Products may stick “tightly” to tracing paper, parchment or wax paper, especially if the icing mass is too liquid.
For better subsequent unsticking of icing products, a thin layer of olive oil is applied to the plastic film (it is non-drying, i.e. non-polymerizing). Sunflower oil is extremely undesirable (!), because... upon contact with air, it polymerizes by combining with oxygen and hardens (like oil paint), therefore it can additionally glue the product, especially during prolonged drying of large parts.
HELPFUL NOTE: It is the property of the applied layer of sunflower oil to polymerize by combining with atmospheric oxygen and harden into an impenetrable insoluble film that is used when impregnating new wooden kitchen boards with sunflower oil, which makes the impregnated boards non-hygroscopic, easy to clean and almost eternal. To impregnate with oil, new boards are allowed to dry additionally in a dry room, then they are generously lubricated on all sides with sunflower oil, which can be heated, the oil is allowed to soak in for 1 hour, then they are generously lubricated again and left for 3-4 days for final drying.
The icing mass should not be too liquid - so that it does not spread out and lose its shape during jigging, and not too thick - so that it is squeezed out of the root without unnecessary effort and does not tear during jigging.
If you prepare a thicker icing mixture, you can use it to sculpt jewelry with your hands, like using plasticine. You should not sculpt too thick decorations, because... they will take too long to dry.
4) Squeeze out the icing onto the plastic film according to the pattern placed underneath it. If you have sufficient artistic skills, you can do without templates, freely drawing in bulk according to your imagination.
When drawing, you can successively use icings colored with food dyes in different colors, which will allow you to get multi-colored decorations.
Icing can be deposited directly on the surface of a finished (baked and cooled) sufficiently dry dough confectionery product (gingerbread, including glazed, shortbread), as well as on chocolate and other things that can be stored outside the refrigerator.
In no case should icing be applied to pastry cream, biscuits or other wet surfaces, as well as to products that require storage only in the refrigerator. Icing decorations are placed on such products immediately before serving.
5) The film with a deposited pattern (or a decorated confectionery product) is left to dry at room temperature (but not higher than +40 degrees C) for 1-2-3 days until the mass is completely dry.
Icing dries differently depending on the size of the part and the humidity in the room. 1-2 days of drying is enough for an ordinary small flower. Large parts can take up to 5-6 days to dry. To speed up drying, products can be placed in a warm, dry place with a temperature no higher than +40°C.
If you want to get a three-dimensional decoration, a film with a deposited pattern is placed for drying on some curved surface - for example, on the side surface of a cylindrical pan, in the spread of an open book, etc.
Properly prepared icing mixture (not too liquid) does not flow down on inclined surfaces. If the deposited mass is a little liquid, you should first let it dry a little until the desired thickening (but not brittle) in a horizontal position and only then place it on a curved surface.
To obtain openwork spherical products, the protein mass is applied to small inflated balloons greased with vegetable oil. After the icing has dried, the balloons are pierced and the deflated shells are carefully removed from the resulting decorations.
6) The dried icing decorations are carefully removed from the backing.
It is better to remove products from the backing at the edge of the table, starting from the corner of the backing, which you carefully pull down, bending the backing over the edge of the edge of the table.
Since products made from icing are very fragile, they must be prepared with some reserve in quantity.
Icing decorations can be glued together with egg white mixed with powdered sugar and then allowed to dry.
To make large volumetric icing decorations, individual parts are made according to drawings, which, after complete drying, are glued into a single product (for example, into an Eiffel Tower - see below).
Broken products are tasty on their own and can be successfully served with tea. It often happens that icing decorations are eaten by family members, especially children, much before they dry out. So a solid supply of ready-made icing decorations never hurts.
The resulting sweet edible lace is used to decorate various confectionery products. Decorations made from icing can be stored for a long time in boxes at room temperature, provided there is no high humidity.
Decorations made from icing cannot be stored in the refrigerator, because... After exposure to the cold, they liquefy. Therefore, pre-prepared icing decorations are placed on cakes only immediately before serving.
Preparing icing
Royal Icing
 | Let's take: | |
 | We inflate the balloons to the desired size and tie them with longer threads, so that we can then hang them to dry. | |
 | Lightly grease each ball with olive oil so that after drying the icing will come off the rubber surface more easily. | |
 | We take the ball by the tied end and start from a pastry bag, using a nozzle (preferably number 1 for greater elegance) we pipe a pattern with icing, while scrolling the ball. | |
 |
In cases where there is no desire to waste time on intricate decoration of homemade sweets, glaze comes to the rescue. There are many answers to the question of how to glaze at home. Sometimes a culinary work is covered entirely with it, sometimes inscriptions are drawn, and it also acts as a layer between the cakes. Decorate the cake with cream and glaze quickly enough, this is unlikely to be difficult.
Decoration options
You need to keep in mind that you can make a cake beautiful in a variety of ways. And before you decorate the cake with icing at home, you should stock up on special pastry tools. Among them are pastry syringes with a set of attachments, parchment, a sharpened knife, and various spatulas.
It should be taken into account that it would be optimal to decorate the cake with chocolate icing at home if it is bird's milk or sponge cake. At the same time, we should not forget that this process is creative. This means that the scope for experimentation here is enormous.
After looking at the photos of cakes decorated with chocolate icing, you should choose which option will be used. After all, the cooking technology can greatly depend on the desired results.
Making a standard chocolate glaze is not difficult. The main thing is to follow the basic culinary rules. Before decorating a cake at home with chocolate icing, it is worth considering that it is necessary to achieve a consistency that is neither thick nor runny. Ideally, the glaze should resemble sour cream. The easiest way is to apply a similar mixture to baked goods. It will harden quite quickly. But if suddenly the mass turns out to be liquid, you should mix it with powdered sugar. If it turns out to be too thick, you need to add a spoonful of warm water to it.
Before beautifully decorating a cake with chocolate icing, it is worth considering the taste properties of the desired dish. Thus, unusual flavor combinations can be easily achieved by mixing lemon juice into the mixture instead of water. Then the product will be slightly sour, which will be unique for a sweet dish.
But when a Lenten variation is needed, it is enough to melt the tile. If someone who is thinking about how to beautifully decorate a cake with chocolate glaze wants to get a soft taste, it is worth adding butter to the mixture. It is noteworthy that if you apply jam to the baked goods before glazing, the mass will lie especially evenly. Usually, the question of how to decorate a cake with chocolate glaze and fruit is asked by more experienced housewives, bearing in mind that decorated products look more aesthetically attractive than their original counterparts. Decorating with glaze takes only a few minutes, but the result is much better.
Chocolate frosting recipe
Before decorating the cake with chocolate icing, it is worth considering that there are several recipes for such a mass. One of the most popular is glaze made from cocoa. When such a mass hardens, it forms a rather beautiful glossy crust.
To make the product tasty, you should choose high-quality butter and dark cocoa. Similar masses are used in the preparation of muffins, pies, and pastries.
The components you will need to stock up on are:
- 4 spoons of milk;
- 50 g butter;
- 1 spoon of cocoa;
- 4 spoons of sugar.
To prepare the glaze, you will first need to melt the butter. After this, you need to add milk and sugar here, and then continue to cook the mixture until it becomes homogeneous. After sifting the cocoa through a sieve, you need to add it here, and then leave everything on the fire for 2 minutes. Before decorating the cake with the chocolate glaze from this recipe, you need to cool the mixture.
During experiments, confectioners achieve interesting variations on how to beautifully decorate a cake with icing. They mix coconut flakes, nuts, and confectionery powder into a similar mass.
Soft glaze
Another way to beautifully decorate a cake with chocolate icing is to prepare a mixture of cocoa and butter.
It is important to consider that the final taste properties of the product are greatly influenced by the choice of products: butter and cocoa from different manufacturers will give different shades of taste.
- 3 tablespoons vanillin;
- 5 spoons of sugar;
- 6 spoons of cocoa;
- 50 g butter.
To prepare the mass, you will need to mix the listed ingredients in a bowl and then place it in a water bath. The mixture must be constantly stirred. Readiness is checked by dripping glaze onto the dishes. Ideally, it should freeze immediately.
Chocolate mixture
The most popular answer to the question of how to decorate a cake with frosting is to prepare a chocolate mixture. Flavor options will vary depending on the chocolate chosen. For those wondering how to decorate a cake with white frosting, you will need white chocolate.
To make such a glaze you need to stock up on:
- 5 spoons of milk;
- 100 g chocolate without additives.
Preparing the mixture is simple: you need to break the tile and put it in a bowl coated with butter. You can't add water here - you need milk. It is due to this that the cake decorated with icing in the photo has a dense coating and not a liquid one.
You need to add milk to the chocolate, and then, placing the mixture in a water bath, wait until the chocolate is completely dissolved. The temperature should be 40 degrees. You need to mix the composition at this time.
If a person is thinking about how to decorate a cake with white icing, it is worth making adjustments to the recipe. Desserts made in this way become especially elegant. Rolls, cakes, and jellies are often decorated with similar glazing.

Prepare a similar mass by mixing cream, condensed milk, and vanilla. The classic recipe is to use:
- 180 g powdered sugar;
- 200 g white chocolate;
- 2 spoons of milk.
To make the mixture, you need to break the tile and put it in a bowl. Afterwards, you need to place it in a water bath, adding powdered sugar. Next, pour in a spoonful of milk and stir the aromatic mass. Once the mixture is smooth, remove it from the heat and then add a spoonful of milk. The mass is whipped with a blender. You need to immediately apply the glaze to the product before it has time to cool.
With sour cream
Another answer to the question of how to decorate a cake with icing is to use a sour cream mixture. In this case, the product will come out somewhat sour. This is suitable for sausages with nuts, cookies, cakes. Such glazing will not drip; for those who are wondering how to decorate a cake with mirror glaze, this recipe is suitable. In addition to this coating, butter cream, nuts, and candied fruits are applied to the product.
To prepare the mixture, you need to take:
- 2 spoons of sour cream;
- 2 spoons of cocoa;
- 4 tablespoons of powdered sugar;
- 0.5 spoons of vanilla sugar;
- 1 spoon of butter.
First of all, mix sour cream, powder, vanillin and cocoa in one bowl. Next, put the mixture on low heat. After boiling it for 5 minutes, stir the glaze and then remove from heat. Then add butter here and mix everything. The mixture is applied to the product before it completely hardens.
Methods for decorating with chocolate
Decorating products with chocolate is considered a classic due to the fact that the ingredient goes perfectly with all kinds of dishes. The main advantage of chocolate is that when melted it can be given any shape. After hardening, this component will not crack or spread. In addition, there is a wide choice at the mixture preparation stage. After all, there is porous, white, milk, and dark chocolate.

The easiest way to decorate a cake with chocolate is to grate the bar and then sprinkle it on the cake. In order to add curls to the product, you need to take a knife and cut the slightly heated chocolate into thin slices. The peculiarity of the material is that in this case it will begin to curl instantly. This is space for cutting out any patterns.
The next way to decorate a culinary product is to create openwork patterns, inscriptions, and drawings. To create them, you need to fill a pastry syringe with chocolate, and then take parchment and draw patterns on it. Taking the syringe, you need to draw them on parchment, and then put it in the refrigerator for final hardening. Next, you need to remove the chocolate and place it on the confectionery product. It makes sense to download a drawing from the Internet and simply transfer it to paper.
It's very easy to make chocolate leaves. It is necessary to take a real leaf of wood and dry it. Next, after melting the chocolate, you need to lay it on the inside of the sheet using a silicone brush. After placing the product in the refrigerator, you need to wait until it completely hardens. After this, the sheet can be placed on the cake. It is also optimal to complement this decoration with cherries, from which you need to first remove the pits.
Caramel glaze
It is necessary to take into account that the options for how to decorate a cake with icing are not limited to chocolate. Caramel glaze is also popular; it can also be marmalade, colored, soft, creamy, or milky.
The caramel variation is just as easy to prepare. You just need to stock up:
- 150 g warm water;
- 180 g sugar;
- 2 teaspoons cornstarch;
- 150 g heavy cream;
- 5 g gelatin.
First of all, you need to soak the gelatin in water, then mix the cream and starch. You will need to melt the sugar in a frying pan until it turns brown. After this, the cream, starch and sugar are mixed with water, bringing the mixture to a boil. Then the caramel dissolves, it needs to be stirred during the process. At the end, gelatin is added here, which will already have time to swell by that time. Cover the cake with the prepared mixture using a wide knife. It is necessary to place the product in the refrigerator for the glazing to finish.

Marmalade glaze
A popular way to make a cake decorated with frosting and fruit is to make a marmalade mixture. To do this you need to take:
- 200 g marmalade;
- 50 g butter;
- 2 tablespoons sour cream;
- 120 g sugar.
To make the glaze, you will need to first melt the marmalade in a water bath, and then add sour cream, butter and sugar. After the mixture is mixed, you need to put it on the fire and cook for 10 minutes. After allowing the mixture to cool, you need to apply it to the cake, then put it in the refrigerator for 3-4 hours. In this case, it is recommended to place fruit on the sides of the product.
Decoration with butter cream
A common answer to the question of how to decorate a cake with drip icing is to prepare a universal cream. It is extremely convenient to draw with this mixture, write congratulations on baked goods, and shape flowers.

To prepare butter cream, you need to take:
- 100 g butter;
- 5 tablespoons of condensed milk;
- Food colorings.
To prepare the mixture, you must first melt the butter in a water bath. Then you need to beat it so that you get a white and fluffy mass. Next, condensed milk is poured here, after which everything is mixed and divided into portions. Dyes are often added to the cream. After this, a syringe is filled with it, and inscriptions and patterns are created. In order for the cream to harden, you need to place the cake with it in the refrigerator.
Decoration with powder
Powder is a universal decoration for confectionery products. There are many varieties of this product. Powder is available in the shapes of flowers, stars, balls, squares, circles and butterflies. She has a very wide range of colors. The powder can be multi-colored, gold, silver, pearl. Nut, chocolate, coconut chips, as well as cookie crumbs and meringues are popular.
When planning to add sprinkles to a cake decorated with icing, you need to keep in mind that the latter is used only on sticky surfaces. You only need to sprinkle the product while the glaze or cream has not yet hardened.
To create the effect of an aquarium, you need to use jelly filling with powder. You need to pour out half of the jelly filling, and then freeze it, cover it with sprinkles and pour jelly on top as well. If you alternate layer by layer, the product will come out extremely beautiful.

To decorate the sides of the cake with sprinkles, which also looks very impressive, you need to place it on a large towel. After sprinkling the sides of the cake and the towel, you need to lift the sides of the product, pressing the towel.
In addition, drawings are often made using powder. For this you need a sheet of paper. You need to cut out the shape of the product, transfer a drawing or inscription onto paper. Finally, the design is cut out and the cake is covered with a template. At the same time, it is not pressed against the surface of the cake. Then, after thoroughly dusting the product with powder, the template is removed. The drawing remains.
Mirror glazing
There are many variations of creating mirror glazing on a product. This is considered beautiful, and the appearance of such decoration varies greatly depending on the chosen recipe.
Most often, a little gelatin is added here or a special syrup is mixed into the glaze. With such ingredients the mass comes out especially shiny. And if bubbles form during glazing, you need to pass the mixture through a sieve before applying it to the product.
It is important to use a thermometer to properly decorate a cake with mirror glaze. After all, the finished mass should be used only when it has time to cool to 35 degrees.
To prepare such a mass, you need:
- 150 g glucose syrup;
- 135 ml water;
- 150 g sugar;
- 100 g condensed milk;
- 15 g gelatin;
- 150 g chocolate.
First of all, to prepare this type of glaze you will need to pour gelatin into 65 ml of water, and then add sugar with syrup and water into a separate bowl, setting it on low heat. It is necessary to stir the mixture until the sugar is completely dissolved in it.
In the next bowl you need to put chocolate with condensed milk and gelatin, pouring hot syrup over all the ingredients. This mixture must be whipped with a blender and then cooled.
Made from chocolate and cream
Chocolate and cream icing has proven itself to be a fairly tasty and beautiful mixture. To prepare it, you need to stock up on quite ordinary products. Among them:
- 100 g chocolate;
- 3 spoons of cream 30%;
- 40 g butter.
To prepare the mixture, you need to break the chocolate, and then put it in a separate bowl, put it in a water bath and, adding butter, melt it. After whipping the cream, you need to pour it here. You will get a fragrant glaze, which should be poured on top of the confectionery product.
Made from milk chocolate
This glaze is suitable for anyone who makes cakes, muffins, and rolls made from thin dough. The aromatic mixture leaves a pleasant and memorable aftertaste. In this case, the surface of the cake will be matte. In order to make it shiny, you will need to add oil here.
To prepare the mixture, you need to take:
- 150 g low-fat cream;
- 180 g chocolate.
First of all, you will need to break the chocolate into several parts and then put everything in one bowl. You also need to pour the cream here, and then heat everything over low heat until the mass becomes homogeneous.

How to frost a cake
In order for the product to turn out aesthetically beautiful, it is important to take into account the recommendations not only at the stage of preparing the glaze, but also at the time of applying the mixture to the product. Although glazing is considered the simplest procedure, there are still a number of subtleties here. For example, if chocolate glaze is used, it must first cool. At the same time, it should not become thick, otherwise the mixture risks turning into lumps.
The best way to decorate a cake with icing is with a rubber brush. If the product is made from dense dough, it is recommended to use apricot or peach jam first. They need to smear the cake and then leave it for a couple of hours. Then, placing the cake on a wire rack, decorate it by pouring the chocolate mixture over it. In this case, you need to level the surface using a rubber brush. It is optimal to complement this type of decoration with nuts, berries, and sprinkles. Next, in any recipe, you need to put the cake in the refrigerator for at least a few hours so that the glazing is completed.
Protein glaze
One of the types of glaze that everyone has known since childhood is protein. This is what is applied to Easter cakes. The classic version does not fit into the framework of a healthy diet due to the content of powder and cream, but there are options for making it in such a way that it is beneficial for the figure.
The most popular type of healthy glaze is protein. To prepare it you will need to take:
- Egg white.
- Sweetener.
- 2 teaspoons lemon juice.
- Salt.
- Vanillin.
First of all, you need to beat the protein, adding the remaining ingredients to the mixture. Afterwards you get a creamy mass with which you need to cover the product. Next, the baked goods are sent to the oven at a temperature of 150 degrees. You need to keep it there for 10 minutes. It is important that the glaze sets. Afterwards, they often sprinkle the cake with powder - 1 teaspoon of sugar balls will not harm the figure.
It is important to consider that before using a sweetener, it is recommended to thoroughly grind it. And only then will it be ready for whipping.
Creamy custard glaze
The frosting from this recipe will taste creamy, reminiscent of condensed milk. This will emphasize the curd flavor of the product. Creamy custard glaze is much higher in calories than protein glaze.
In preparation you will need:
- Low-fat milk.
- Sweetener.
- Corn starch.
- Salt.
For 200 ml of milk you will need 1 tablespoon of starch. The remaining ingredients are added to taste.
You need to heat the milk without bringing it to a boil, and then dissolve starch, salt and sweetener here. It is necessary to put this mixture on the stove and boil until a thick creamy mass is obtained. The consistency is adjusted to taste. The classic option is the thickness of sour cream. This will allow you to get nice drips without making the glaze too liquid.
Yogurt glaze
It is recommended to add sugar-free diet syrup to this type of glaze. Low-fat thick yogurt is used here. Soft cottage cheese, gelatin, milk, and salt are also suitable. For 200 g of yogurt you need to use 1 tablespoon of gelatin and 3 tablespoons of milk.
Gelatin must first be diluted in milk, and then mixed with yogurt, salt and sweetener. Additives can include syrup, lemon zest, vanillin, cardamom, cinnamon, baby fruit puree, cocoa. Once this mixture hardens, it will turn into a soufflé.
A very specific option is glazing with a pistachio mixture. You must first purchase pistachio protein paste. This is usually available in health food stores.

For this glaze you will need only 1 teaspoon of pistachio paste, add 3 tablespoons of milk, 1 tablespoon of cottage cheese, and a sweetener. Once the mixture is stirred, the glaze is ready. It must be applied to the cake, and then put in the refrigerator for an hour. After an hour, the glaze will have hardened and the cake will be ready to eat.
If desired, you can easily replace it with processed diet cheese. The main task here will be the selection of unsalted cheese. The recipe remains the same as in the previous case. At the same time, according to reviews, such mixtures are among the most delicious glaze options as part of proper nutrition. It is recommended to use the glaze with pancakes.
During the holidays, we suggest that you don’t give up sweets, but cook something extraordinarily wonderful. After all, you don’t have to prepare complex desserts; you can use a proven recipe and pay special attention to decorations. We bring you 19 decorations for sweet dishes.
Chocolate decorations
Chocolate glaze
Decorating profiteroles with chocolate icing
If you have already mastered the recipe for making chocolate glaze, create elegant decorations from it. They can be used for cakes, pastries, ice cream, souffles and mousses.

Chocolate icing decorations
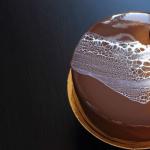
Mirror chocolate glaze
Chocolate mirror glaze
Mirror glaze is great for popular mousse cakes. See how it works with mirror glaze pastry chef Anna Aksyonova (@goonie). Don't be confused by the color of the glaze and the decorative element - that was the order. Pay attention to the process itself, how to create an impressive cake decor using simple means.
Strawberries in chocolate
It would seem that there is nothing special about this combination. Well, the berries are, well, sweet. Tasty, of course, but banal, not new... However, for some reason chocolate covered strawberries always disappears from the table (and even from the surface of the cake) first!
Strawberries in chocolate
Candied orange peels in chocolate
Candied fruits themselves are an excellent decoration for sweet dishes. They look like pieces of multi-colored glass, sometimes transparent and sometimes frosted. Candied orange peel Moreover, they are extremely tasty. And if you dip them in chocolate, they turn into an independent treat and, by the way, an excellent edible gift. Of course, we made them larger at once, so that there would be enough for the guests and something to decorate the cake with.
Candied orange peels in chocolate
Fruits and berries painted with chocolate
Jewelry can be formal, but it can also be fun, mischievous and with soul. Especially if you are preparing dessert at home with your children. Teach them to make “pounds” from parchment and paint fruits with any patterns. And then just look to fruits and berries painted with chocolate, did not disappear immediately. They are so great to decorate with. New Year's log !
Painted fruits and berries
Chocolate with applique
Chocolate jewelry with applique
White chocolate nougat
Chocolate nougat
Chocolate truffles
You don't need to be a great pastry chef to make chocolate truffles Houses. Even chocolate is for them temper you won't have to. It is enough to melt the chocolate in a water bath, mix it with hot cream and, when the mixture has cooled to the desired temperature, stir in the softened butter. Lumps of chocolate ganache are rolled in cocoa - and truffle candies ready. We eat them, give them to friends and work colleagues, and also decorate sweet dishes.

Handmade chocolate truffles
Caramel for decorating desserts
Caramel decor details
Caramel
Liquid caramel for cake decoration
Liquid caramel as an element of cake decoration
Caramel berries and fruit pieces
It's hard to find a material for decorating desserts that looks better than caramel... but only in the right hands. Making candy nets and sugar flowers requires a lot of experience. But with fruits and berries in caramel everything is much simpler. They still look very impressive.
Fruits and berries in caramel
Praline
Praline
Sugar glaze for painting details and filling surfaces
Sugar glaze with egg white for painting
Sugar glaze for painting cookies
Sugar icing with butter for filling large surfaces
If you want to work with large shapes and glaze them, use this recipe .
Sugar icing for filling cakes
Gingerbread house painted with sugar icing
Every year in December, all European capitals are lined with Christmas markets. One of the most important and delicious signs of the holiday is delicious gingerbread. This Gingerbread house- Moscow variation on a European theme. You definitely can’t do without sugar glaze (made from egg whites and powdered sugar)!
Gingerbread house
Cookies and small pastries as elements for decorating desserts
Shortbread cookies of different shapes
This is exactly the case when the duet of orange and cinnamon is a sure hit on target. The present holiday cookies with a bright citrus and spicy aroma. You can put it on the side of a cake covered with fondant, and the baked goods will become even more festive. And if cookies paint it with colored glaze and you will get a masterpiece.
Orange Star Cookies with Cinnamon
Figured oatmeal cookies
New Year's cookies don't have to be ginger or chocolate. If oat cookies make it in the form of a Christmas tree decorated with chocolate drops, it will turn out very festive. These cookies can be used to decorate ice cream or souffle, combining the delicate consistency of the dessert and the crunch of the baked goods.
Oatmeal cookies
Macaroons - replacement for pasta
Amaretti cookies
Small-piece baked goods Deep-fried mushrooms for decorating cakes
Mushrooms for decorating desserts
Bonus: Snowman cake for small and adult children
Snowman Cake- the most New Year's version of dessert. The cake can also be prepared for Christmas. It's not very difficult to prepare. The main thing is to do this carefully so that the Snowman turns out cute and well-groomed, and not grimy, as he usually is at the end of winter.

Snowman sponge cake
We also recommend
 Imitated caviar What can be prepared from imitation caviar
 Simple and delicious baking - sausages in puff pastry How to bake sausages in puff pastry
 Assortment, preparation technology and application
 Cucumber salad “Winter's Tale”
 Smoked chicken wings
 How to cook salmon tartare correctly: recipes with avocado and shrimp