Red velvet cake with salted caramel. Red Velvet Cake is a delicious dessert with simple recipes! Red Velvet Cake: original, classic recipe
The red velvet cake recipe was invented in the USA. And then the unusual Red Velvet conquered the whole world. Bright and extravagant, it is distinguished by its luxurious design and delicate, airy taste.
The subtleties of creating a red velvet cake

The ingredients of Red Velvet Cake include sugar, butter, eggs, flour, soft curd cheese, and buttermilk. If the last component cannot be found, it is replaced with kefir, and the cheese with sour cream. The cake gets all its valuable properties from its ingredients: it is perfectly filling and, thanks to the large amount of calcium in dairy products, is good for bones and hair.
This is a filling and high-calorie biscuit. People who are overweight and have impaired glucose tolerance are not recommended to abuse it.
To give the cakes a rich scarlet color, use food coloring.. If you are not a fan of such additives, use beetroot juice or puree for the cake with the addition of a small amount of lemon juice or vinegar. Also, cherry, currant or raspberry syrup can give a reddish tone. There is no need to sour them.
Check the readiness of the baked cakes with a wooden toothpick. If the dough does not stick to it, you can remove the dessert from the oven.
It must be remembered that when baking, the edges of the cakes always become darker. Here they take on an ugly dirty brown color. They need to be trimmed, giving the treat an even shape. This is usually done with a special metal confectionery ring.
There is no need to throw away the remaining cakes. They should be crushed and layered with cream in vases. You will get two desserts at once.
How to make the perfect red velvet cake frosting? Eat a few culinary tricks:
- It is better to use curd cheese as a base. Creamy is more like processed cheese; it will not give the desired texture.
- The cheese should sit at least overnight in the refrigerator before beating. But butter, if it is in the recipe, on the contrary, melt at room temperature.
- Well-whipped cheese cream can be used to cover the sides and top of the dessert. It doesn't slip or leak. It is even possible to decorate the cake with cream roses and patterns.
- To achieve a perfectly white tone, you first need to beat butter or cream with powdered sugar. And then add cheese.
Vanilla powder makes the cream more fragrant.

How to decorate a red velvet cake? Sometimes crumbs from scraps are used for dusting, or slices of fruit are placed on top for dessert. But most often the contrast of cream and scarlet cakes is enough. To make this combination look more advantageous, the delicacy is served already cut. For a romantic date, you can decorate the “Red Velvet” cake as in the photo in the shape of a heart and attach a decoration in the form of Cupid’s arrow made of chocolate.
Simple and complex versions of “Red Velvet”
Melt-in-your-mouth desserts with a red base and boiled cream vary in recipe. Everyone can choose the ideal option for themselves.
Classic red velvet cake recipe

The original red velvet cake recipe calls for buttermilk. But if you can’t find it, you can take kefir. The taste will not suffer from this. It’s easy to create a red velvet cake at home using a step-by-step recipe with photos.
Ingredients:
- half a kilo of flour;
- four eggs;
- 2.5 cups sugar;
- the same amount of soft cheese and 33 percent cream;
- a pinch of salt and soda;
- scarlet food coloring;
- 160 grams of powdered sugar;
- two dessert spoons of cocoa;
- one and a half glasses of kefir;
- 0.4 liters of vegetable oil;
- four pinches of baking powder.
Cooking method:

You need to coat all the cakes with this cream and decorate the top and, if desired, the sides. Then the dessert should “ripen” in the cold for three hours.
Video recipe for the classic Red Velvet cake:
Red Velvet Cheesecake

This homemade red velvet cake recipe is unusual in that it doesn't require an oven. There is no need to bake this delicate cheesecake.
Ingredients:
- 380 grams of coffee cookies;
- twice as much cottage cheese;
- 220 grams of sweet cream butter;
- 150 ml milk;
- a glass of granulated sugar;
- half the amount of fat sour cream;
- 20 grams of gelatin;
- a packet of vanillin;
- three large spoons of cocoa powder;
- scarlet food coloring.
Cooking method:
- Melt the butter in a steam bath. Mix with crushed cookies and put the resulting mixture in the mold, cool.
- Pour water over the gelatin so that it swells.
- Beat cottage cheese, sour cream and cocoa with a mixer at low speed or by hand.
- Dissolve sugar and vanillin in milk, heat to a boil. Once the mixture has cooled slightly, add gelatin and stir until smooth. Put the dye and curd mass there and stir. You should get a scarlet creamy composition.
Remove the base from the refrigerator, pour the scarlet mixture on top and return it back to the cold for nine hours.
To ensure that the curd layer comes out even, you need to tap the filled mold on the countertop.
Red Velvet Cake with Beetroot

The step-by-step recipe for red velvet cake without dye with beetroot juice will delight connoisseurs of natural food.
Ingredients:
- 240 grams of flour;
- a teaspoon of cocoa;
- twice as much baking powder;
- half a glass of vegetable oil;
- a bag of vanilla powder;
- one and a half glasses of sugar;
- 240 ml milk;
- six eggs;
- beet;
- a third of a glass of kefir;
- the same amount of water;
- a large spoon of wine vinegar;
- 250 grams of soft cheese;
- 220 grams of sweet cream butter.
Cooking method:

This recipe is easy to make red velvet cake in the slow cooker. The shortbreads are cooked in the “Baking” mode for about three quarters of an hour. The baking time decreases in inverse proportion to the width of the appliance bowl. Then you need to finish baking the cake base in the “Warming” mode for another 20 minutes.
Velvet desserts from celebrities
Famous chefs and confectioners have slightly transformed the classic recipe for the delicacy. However, his appearance remained unchanged.
Red Velvet Cake from Yulia Vysotskaya

The famous TV presenter replaced buttermilk with cream in her recipe for a bright dessert.
Ingredients:
- 350 grams of flour;
- four eggs;
- a couple of dessert spoons of cocoa;
- one and a half glasses of granulated sugar;
- a couple of small spoons of baking powder;
- a pinch of salt and soda;
- 280 ml vegetable oil;
- 700 ml 33 percent cream;
- 170 grams of sour cream;
- the same amount of powdered sugar;
- half a kilogram of soft cheese;
- scarlet food coloring.
Cooking method:
- Combine sifted flour, cocoa, sugar, baking powder, soda, add salt. Beat in eggs and butter, sour cream and the same amount of cream. Color with food pigment and knead the reddish dough. He needs to stand for a quarter of an hour for the lactic acid to extinguish the soda.
- There should be enough dough for three cakes. Bake each for 20 minutes at 180 degrees in the oven. Cover with plastic and refrigerate for an hour and a half.
- To make the cream, combine whipped cream with powder and cheese.
Then you should layer the cakes with cream, grease the top and sides with it. The treat needs to stand in the cold for at least five hours.
Red Velvet Cake by Gordon Ramsay

The famous chef Gordon Ramsay knows how to make a magnificent red velvet cake. Why not use his ideas.
Ingredients:
- 580 grams of flour;
- two pinches of baking powder;
- a couple of large spoons of cocoa;
- scarlet food coloring;
- 330 grams of sugar;
- a pair of eggs;
- a packet of vanillin;
- 270 ml buttermilk (kefir);
- a pinch of soda;
- a drop of vinegar;
- 450 grams of soft cheese;
- two packs of sweet cream butter;
- half a kilo of powdered sugar.
Cooking method:
- Mix flour with baking soda and baking powder.
- Beat half the sweet butter with sugar in a blender. Add eggs one at a time. Gently add vanilla powder and coloring, knead into a homogeneous mass at low speed.
- Pour into a bowl and alternately add buttermilk and flour. Knead the dough.
- Quench the baking soda with vinegar and stir into the dough.
- Grease the molds with butter and sprinkle with flour.
- Divide the dough into molds and place in the oven. Cook for about half an hour at 170 degrees.
- Combine the remaining oil with a mixer and powder. Gradually add cheese while beating. The cream comes out soft and fluffy.
Cooled cakes need to be coated with cream. They also lubricate the top and sides of the treat.
Red Velvet Cakes by Andy Chef

The famous culinary specialist Andy Chef offers both classic and unusual ways of making dessert. These are cupcakes - small portioned cakes. Here is Andy Chef's recipe for red velvet cake with photos.
Ingredients:
- 300 grams of flour;
- a glass of granulated sugar;
- a pair of eggs;
- half a glass of milk;
- 60 grams of sweet cream butter.
- four large spoons of olive oil;
- 40 grams of cocoa;
- for packaging vanillin and baking powder;
- scarlet food coloring.
Cooking method:

The cupcakes are topped with egg white cream or whipped cream and sprinkled with colorful confectionery shavings.
A bright and tasty dessert “Red Velvet” will decorate the table at any celebration. It will also make a wonderful gift for a romantic anniversary.
The process of making red velvet cake according to the original recipe consists of 3 stages:
- baking cakes;
- preparing cream;
- assembling the cake.
In addition to the above ingredients, you will need an oven that maintains a temperature of 180 degrees Celsius, 2 cake pans with a diameter of 23 centimeters, pastry tools and utensils.
If you have two 23 cm baking pans available, then you can bake 2 cakes at once, and if there is only one pan, then one at a time. If the pan is tall, then you can bake one cake and then cut it into 2 parts horizontally in the middle. Also, if desired, you can make a cake consisting of 3 layers.
Stage 1 – Baking the cakes:
- Preheat the oven to 180 degrees Celsius.
- Sift cocoa powder.
- Sift the flour.
- Remove 150 grams of butter from the refrigerator and leave to warm to room temperature and soft consistency.
- Grease two 23cm cake pans with butter, or one if you only have one pan.
- Sprinkle 1 tablespoon of sifted cocoa powder evenly into greased pans. Tap the molds to distribute the cocoa evenly over the entire surface, release any excess cocoa powder, and pour the excess out of the molds. If there is only one mold, then you need to pour half of one tablespoon of cocoa onto it.
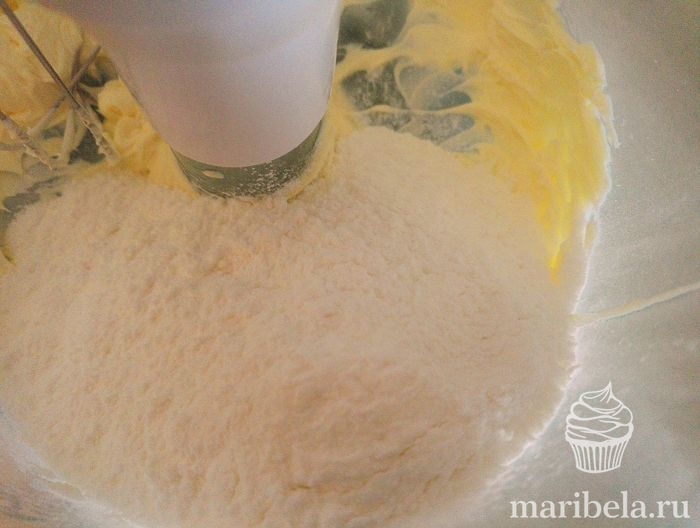
- Mix 300 grams of sugar and 115 grams of soft butter.
- Add a chicken egg to the butter and sugar and beat vigorously until smooth. Then add another egg and beat vigorously until smooth.
- Add 15 grams of vanilla sugar to the butter-egg mixture and beat until smooth.
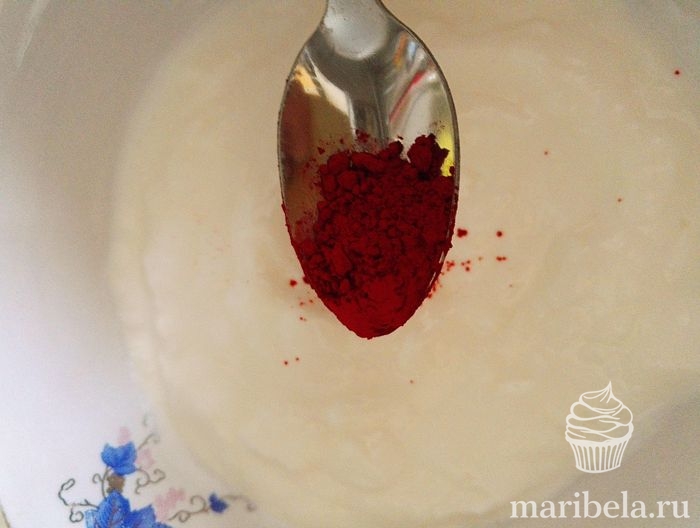
- In a separate container, mix 2 tablespoons of sifted cocoa powder and 2 tablespoons of red food coloring.
- Add the cocoa and red food coloring mixture to the butter-egg mixture. And beat until smooth.
- Mix together 320 grams of sifted flour, 1 teaspoon of soda, 1 teaspoon of salt and sift. Divide into 2 equal parts.
- Add one part of the mixture of flour with soda and salt and 117 milliliters of kefir to the oil mixture and stir until smooth.
- Add 1 tablespoon of vinegar to the remaining kefir and stir.
- Add the second part of the mixture of flour with soda and salt and the remaining kefir with added vinegar to the oil mixture and stir until smooth.
- Divide the resulting dough into 2 equal parts, place in two 23 cm pans and bake for about 25 minutes in an oven preheated to 180 degrees Celsius. Check readiness with a wooden stick. If the stick is dry, then the dough is ready. If you use 1 mold, then the cakes can be baked one at a time, remembering to follow the instructions from points 5 and 6. If the pan is tall, then you can bake one cake and then cut it horizontally into 2 equal parts when the dough has cooled and set. But it’s faster and easier to bake cakes in 2 forms at once. You can also bake 3 layers and use them in a cake, then you will get a cake consisting of 3 layers.
- Place the cakes on a wire rack and leave to cool.
Stage 2 – Preparation of cream:
- Place 230 grams of butter from the refrigerator to soften.
- Pour 235 milliliters of milk and pour 40 grams of flour into a saucepan, place over medium heat and whisk. Bring to a boil, stirring the mixture constantly until it becomes thick. After this, remove from heat.
- Add 15 grams of vanilla sugar and a pinch of salt to the mixture and beat well.
- Pour the milk mixture into a bowl to help the mixture cool faster. Cover with film to prevent foam from forming on the surface.
- Place 230 grams of melted butter and 200 grams of granulated sugar in a separate mixing container. Beat with a mixer for about 5 minutes until the mixture becomes white and fluffy.
- Then, continuing to beat the butter mixture with a mixer at medium speed, add the cooled milk mixture in small portions. The result should be a snow-white classic cream for a Red Velvet cake, similar in consistency to whipped cream.
Stage 3 – Assembling the cake:
- Trim any bumps from the cakes. The scraps can be crumbled and then sprinkled on top of the cake.
- Place the first cake layer flat on a serving plate.
- Place about a cup of cream on top of the first cake layer and spread evenly over the surface with a flat spatula.
- Place the second cake layer on top, flat surface down.
- Spread the remaining cream evenly over the top and sides of the cake.
- You can sprinkle red velvet on top with biscuit crumbs.
The classic red velvet cake is ready! Bon appetit!
Good day, restless culinary confectioners! Why days? Yes, because I know from myself that if you want to present something new and tasty for a holiday, or just for a family tea party, you will spend days surfing the Internet in search of an unusual recipe.
Consider that you have already found it. I would like to invite you to bake an incredibly tasty and beautiful red velvet cake. I give the recipe with photos step by step. It received its noble name thanks to the bright red color of the cakes.
The contrast of the red sponge cake with the snow-white cream creates a magnificent picture. And the possibility of a wide variety of decorations only enhances the effect. Cream flowers, icing, fresh berries and fruits, candied fruits - imagine and create!
Here are some more delicious cake recipes:
The attractive appearance is complemented by amazing taste. Porous cakes with a slight taste of cocoa, soaked in the most delicate buttercream - a dessert like "yat", or in other words - you won't be able to pull your ears off!
They write that “Red Velvet” comes from America, where it is called Red velvet. It's also beautiful. So, as you master a new recipe, conquer a new continent.
Red Velvet Cake is a godsend for the chef. Try it and see for yourself. You will surprise and conquer everyone with excellent taste and unique appearance, I already know that for sure. For Valentine's Day there was a heart shaped cake. The effect is simply amazing, you can’t find another word!
Before getting into the list of ingredients, I would like to immediately tell beginners - do not be intimidated by the extensive list of products. The cake is not at all difficult to prepare. If you follow the step-by-step instructions, everything will definitely work out. Well, nothing can scare experienced chefs.
A couple more nuances:
- The proportions will be indicated for a mold with a diameter of 20-22 centimeters. If you have a larger shape, increase the amount proportionally. Otherwise, the cake will turn out short and the effect will not be the same.
- You need to bake two cakes. It’s good if you have two forms, no, proceed one by one.
So, we are preparing products for mastering American cuisine.
To bake the cakes we need

- Four eggs
- One and a half tablespoons of cocoa powder
- Four hundred fifty gr. flour
- Four hundred ml of vegetable oil
- Three hundred seventy gr. kefir
- Quarter tsp. fine salt
- Four hundred grams of sugar
- Two and a half tsp. baking powder (take without a slide)
- One and a half teaspoons of soda (without a slide)
- Two to three teaspoons of red gel coloring
For cream
- Three hundred gr. cream, fat content 33-35
- Four hundred gr. cream (curd) cheese
- One hundred and fifty gr. powdered sugar
- Sift the flour, it will be better enriched with oxygen.
- Cocoa also needs to be sifted.
- Choose sunflower oil of good quality, odorless. Otherwise you will spoil the cakes. Use strictly according to the recipe, do not skimp, because it is the oil that ensures the porosity of the crumb.
- Buy a gel dye; it will color the dough better with crimson than powder dye. If you can't buy it, order it online.
- Before you start working miracles, I advise you to prepare three suitable bowls, preferably deep ones. This is necessary in order to mix dry and liquid ingredients separately.
- Cool the eggs and cream before using. This way these products will whip up better.
- The cream cheese should be softened, so it's best to remove it from the refrigerator before cooking.
Let's start preparing the cake
- Start step-by-step preparation by turning on the oven, which should warm up to 180 degrees.
- Take a bowl that is convenient for whipping (keep in mind that other components will be added here during the process, so calculate the “depth” of the bowl).
- Break eggs into it.
- Add sugar, mix, time and beat for at least five minutes. Wait for a while, you should get a light and thickened mass.

- Pour kefir into a separate bowl, add soda (no need to extinguish it, kefir will do this), stir well.

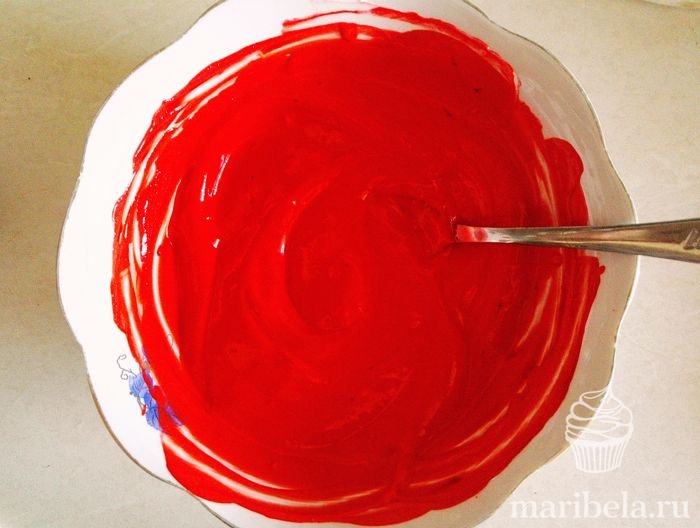
- Add dye to kefir. Don’t forget to stir; the liquid should evenly turn a bright red color. Remember that a pale shade will not suit us; add dye if necessary.

- Add butter to kefir and mix well.

- Take another bowl, stir flour, cocoa, baking powder and salt in it. Mix thoroughly.

- Add the dry mixture to the egg mixture and stir.
- Then add colored kefir and butter, mix. The mass should be homogeneous, without lumps of flour. Treat this nuance responsibly. You can even use a mixer.

- Set the dough aside for ten minutes, let it rest and let the ingredients become friends. Any dough needs to be given time to rest, biscuit is no exception.
- At this time, prepare the molds: if they are detachable, then cover the bottom with parchment, there is no need to grease the sides, the dough contains a sufficient amount of fat.
- Divide the dough into two halves.

- Bake for min. 30-40. Adjust the time by checking the cakes with a wooden skewer or toothpick. There should be no dough residue on them. Remember that the oven should not be opened for the first 20 minutes, otherwise the sponge cake may fall off. It is important.

- When ready, remove the pan from the oven.
- The cakes need to be cooled, then each is cut into 2 halves. We should have four cakes.

- The convex parts must be carefully cut off with a sharp knife - the surface of the cake should be smooth. We will not let the cut parts go to waste - we will rub them on a grater. The crumb will be useful for decorating the masterpiece.
While the cake is cooling, make the cream.
How to make red velvet cake cream
In order for the cream to turn out well, we carefully prepared - the ingredients were prepared, the cream was cooled, and the mixer was at hand. So go ahead, and as they say, with a song.
By the way, about the song, the mood should be really upbeat, and there should also be confidence in a good result. Skeptical approaches have no place in the kitchen - this has been tested from my own experience, more than once.

That's all the wisdom. The snow-white cream is ready for the further process - cake formation.
How to Form a Red Velvet Cake
This is the most interesting moment, believe me. When you have four fiery red cake layers and boiling white cream in front of you, you want to create not just a cake, but something extraordinarily beautiful!
After all, making a cake is not just about baking delicious cakes. It’s still a matter of putting it together correctly and decorating it with imagination. In other words, not only to treat, but also to surprise and delight.
Thoughts get confused in my head, ideas get ahead of each other (honestly). But first, let's form the cake. We have cream and four cake layers, the moisture and porosity of which prevents them from being soaked.
Before assembly I want to give some practical advice. Divide the cream into five approximately equal parts (either mentally or literally, dividing with a spoon) - this will allow the cream layers to be identical.
The cross-sectional appearance will be much better. Apply a fifth of the cream around the circumference of the cake.

Before serving, let the cake sit for at least 3-4 hours. The ideal option is to treat you to dessert prepared the day before.
Be sure to make Red Velvet. Your efforts will be appreciated with the highest scores!

Velvety splendor can be baked even in a slow cooker. The result is excellent, the cake turns out tall and incredibly tasty. Just lick your fingers! And the appearance blows away even the most biased gourmet.
Plus saving time, which is always in short supply.
This recipe makes two red cake layers, as opposed to the classic recipe with four layers. The cakes are thicker. Therefore, they are soaked, which makes them unusually juicy and tender.
The impregnation can be different, the main thing is to maintain the theme - white and red. This recipe calls for a cherry dip. The effect is incredible. If you have a slow cooker, be sure to adopt this recipe.
For the biscuit dough you need to prepare

- Three eggs (must be cold)
- Sugar 270 gr.
- Vegetable oil 280 ml (necessarily refined and high-quality, odorless)
- Kefir 280 ml (choose thicker)
- Flour 350 grams
- Baking soda 1 tsp.
- Ten grams of baking powder for dough
- A pinch of fine salt
- Cocoa powder 15 grams
- Ten grams of food coloring (preferably gel and, of course, red)
For soaking cakes
- Pitted cherries 400 grams
- Sugar 100 gr.
For cream
- Cream (33%) 100 ml (be sure to cool before preparing the cream)
- 500 grams of cream cheese (must be softened)
- Powdered sugar 110 grams
Step-by-step preparation
- Break the eggs into a deep bowl, add sugar, beat until a thick, lightened mass forms. You can do this quickly with a mixer. 5 minutes. and you're done.

- Add vegetable oil to the mixture, stir until smooth.

- Add soda to kefir, stir thoroughly and leave to simmer.

- After the soda in the kefir has quenched, pour the egg mixture into it.

- Add coloring to the dough and mix thoroughly. It should turn out bright red. If there is not enough color, add dye. The dough should be evenly colored. If necessary, beat it with a mixer.

- In a separate bowl, combine flour with cocoa, add salt, baking soda and baking powder, mix the dry mixture.
- Gradually add the dry mass to the kefir and stir the dough. There should be no lumps.

- Bake according to the “Baking” program for one and a half hours.
- Use a wooden skewer to check the doneness after the time has elapsed - it should be dry and clean. If necessary, add 20-30 minutes.

- Cool the finished biscuit.
The cake cools down, and we prepare the impregnation, also in a slow cooker
- Place cherries and sugar into a bowl. Cook on the “Jam” program for 15 minutes.
- Then separate the cherries from the syrup, which will be our impregnation. Cherries will keep company with the cream and serve as a tasty layer.
Having said thanks to the miracle of technology, we next prepare the cream
For better whipping, I advise you to cool the dishes, the mixer whisks, and the cream, of course. To save time, you can place it in the freezer for 5-10 minutes.
- Whip the cream until thick.
- Mix cheese with powdered sugar.
- Then add cream to the cheese, mix everything carefully. You can lightly beat with a mixer. Just set it to the lowest speed.
- Place the cream in the refrigerator for half an hour, maybe a little less.
Assembling the cake

For decoration, use crumbs from the cut top, fresh berries and fruits. Whatever is at hand. But it should be in moderation – elegant and noble, supporting the brand name “Red Velvet”.

The cake is ready! It turned out beautiful and tasty. You have outdone yourself, bravo master! Have fun everyone!
By the way, this cake can be made without cherry filling, as in these photos. There was simply no way to cook it.
Hi all. Today I will share with you the recipe for Red Velvet Cake. Yes, I already have one recipe for this legendary cake on the blog, but this time it will not be made with vegetable oil, but with yogurt. And this, so to speak, is its light version.
I found this recipe a long time ago on @shanti_aa’s Instagram page; it captivated me with its composition. It doesn’t contain “a liter of butter and a kilogram of sugar”) So I prepared it immediately. And now, I’ll tell you frankly, I make this cake exclusively according to this recipe.
The biscuit turns out so tender and fluffy, it’s like a weightless cloud.
I will first describe the entire cooking process, and then all the nuances of working with such cakes.
So, how to make red velvet cake with adding yogurt at home with photos step by step.
Ingredients for a mold diameter of 18 cm:
- 95 grams butter at room temperature
- 180 grams of powdered sugar
- 2 small eggs (C2)
- 190 grams flour
- 4 g strong cocoa (alkalized)
- 1 half teaspoon of soda
- 0.5 tsp baking powder
- 0.25 tsp salt
- 170 ml. natural yogurt
- 0.5 tsp dry dye (or 1 tsp gel)
Preparation:
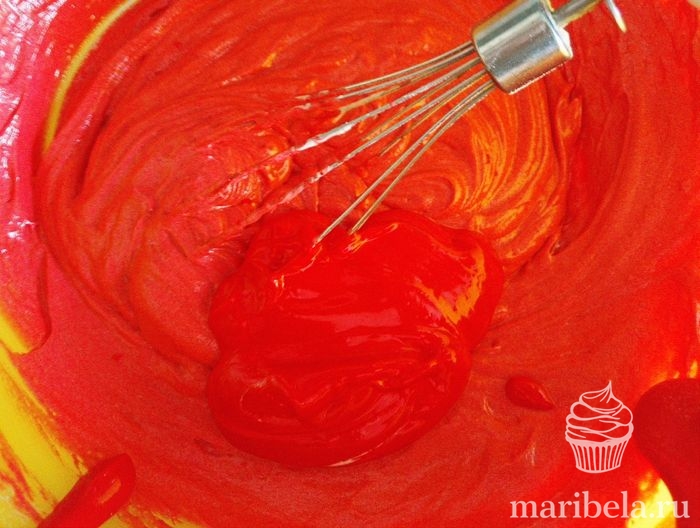
Place butter at room temperature (you can use 72% for the dough) in a mixer bowl and beat together with the powder at high speed until white. In my mixer this takes about 5-7 minutes.

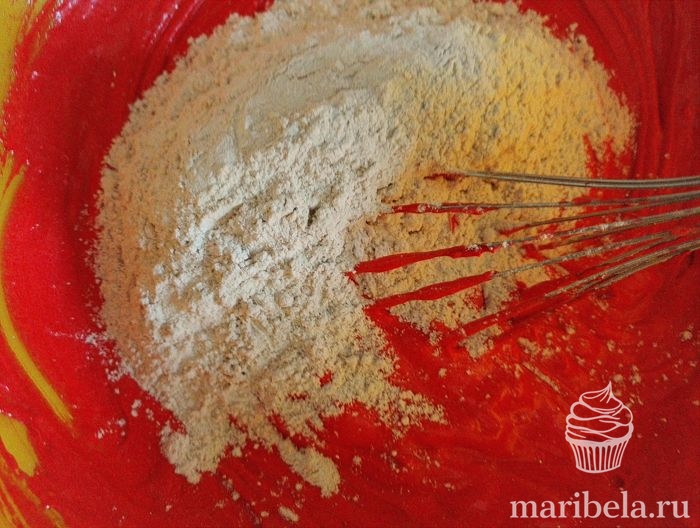
While the butter is whipping, you need to sift all the dry ingredients: flour, cocoa, soda, baking powder, salt. And mix them thoroughly with a whisk.

Dissolve the dye in yogurt and leave it for a while.
Yogurt should be natural, without dyes, at room temperature. I prepared this sponge cake with Greek yogurt, Sloboda, Danone and Activia yogurt. The main thing is that it should not be drinking yogurt. They usually have a fat content of about 6%. You can also use homemade yogurt if that's what you do.
Let me make a reservation right away: you won’t be able to color the biscuit with beet juice. If you don't have food coloring in the house, then, unfortunately, you can't make red velvet. But, you can find a replacement for it (there are many good recipes on my blog) or simply cook it without dye. I have India dye, I bought it by weight at a confectionery store. It is quite possible to paint with gel dyes; I use Americolor and Top Product.

Then add half the yogurt there and mix again.
Then again a third of the bulk.

Then the remaining yogurt.
Then loose. Mix everything well every time.
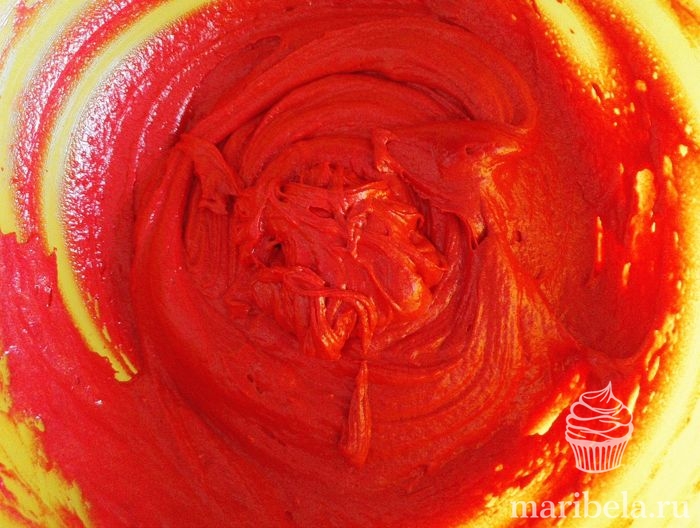
This is the consistency of the dough.
I bake in a split ring and don’t grease the sides with anything. I just wrap the bottom in foil.
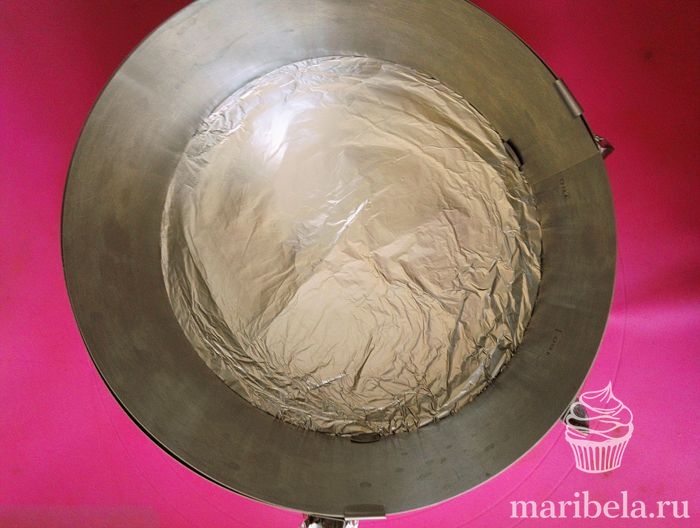
Attention, the cake rises very well. It measures 6-7 centimeters in height, so don’t fill out the form any more. than half.

Place in a preheated oven at 160º degrees and bake for about an hour. I bake for about 50 minutes. So look at the dry splinter. I always go by smell; as soon as it smells good, I go check everything.
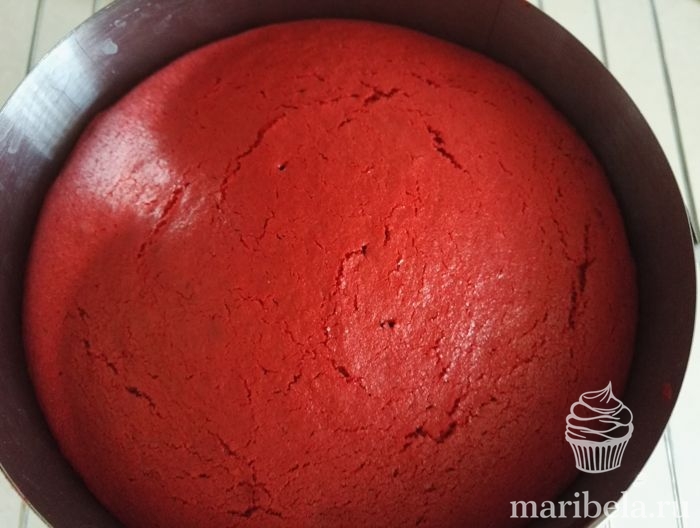
Next, you need to properly cool this biscuit. It must be turned directly into the mold onto a wire rack or onto a support in the form of cans, so it must cool completely. The biscuit is very tender, this is done so that it does not settle when cooling.

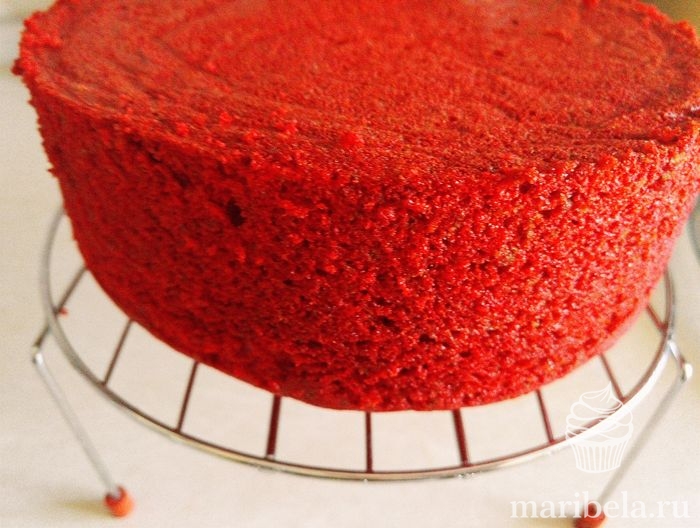
Then, use a knife to pass along the edges of the mold and remove the cake. Do you see how tall and wet he is?!
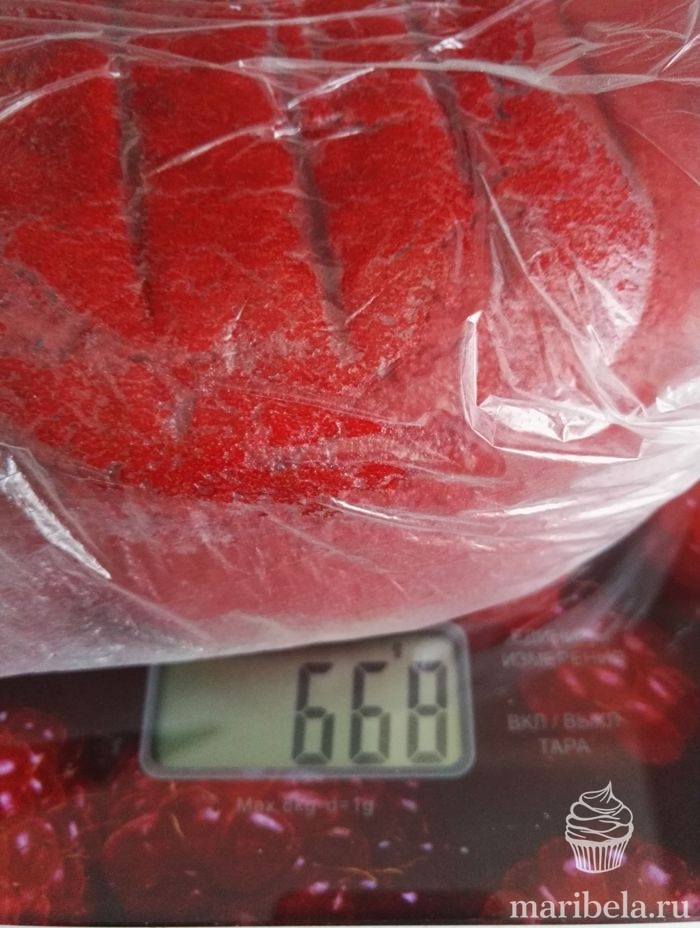
Wrap it in film and put it in the refrigerator overnight to redistribute moisture. The final result is 670 grams by weight.
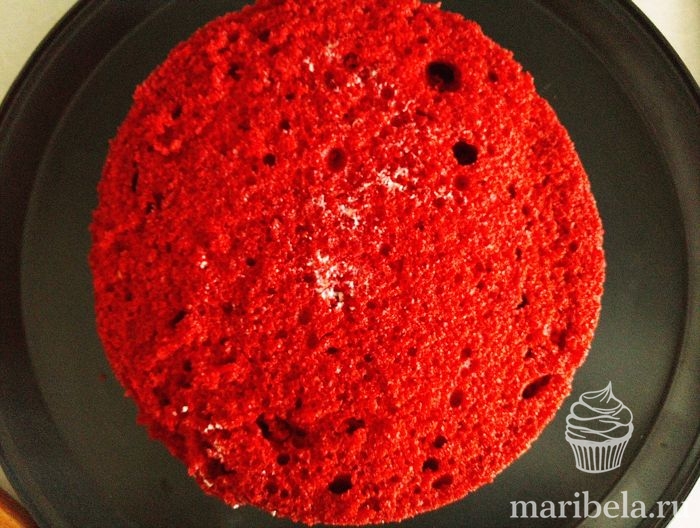
In the morning, cut the sponge cake into 3 layers, be extremely careful here, because the sponge cake is very delicate, it can break if handled roughly.

What other nuances are there when working with it?
Well, firstly, it does not contain vegetable oil, therefore the biscuit requires impregnation, but not much! Here you need to know when to stop, because due to its airiness, the sponge cake absorbs moisture and, by over-soaking it, your cake can “float”, as happened to me once.
Secondly, the cake is delicate; the edge always breaks off a little when cutting, so we cut it carefully.
Thirdly, it crumbles. Therefore, be sure to make a rough layer so that later there are no crumbs on the outside.
Now I’ll show you how I assembled this cake.
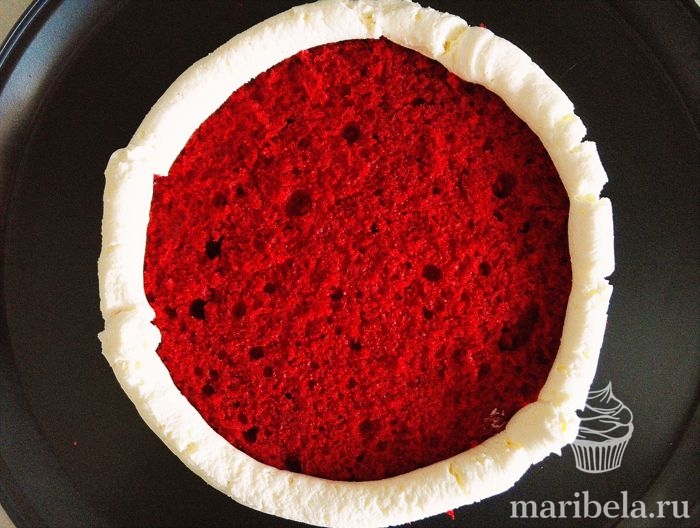
We make a border of finishing cream along the edge. You need a thick cream that holds its shape well and is convenient for you to work with in terms of leveling.
It can be (as in my case), or (all recipes are available via links, just click on the desired name and you will be taken to the page).
Why is it necessary to make sides from thick cream? To ensure that the filling does not leak outside the cake) Make this a rule, otherwise the cake may “float” or move out.
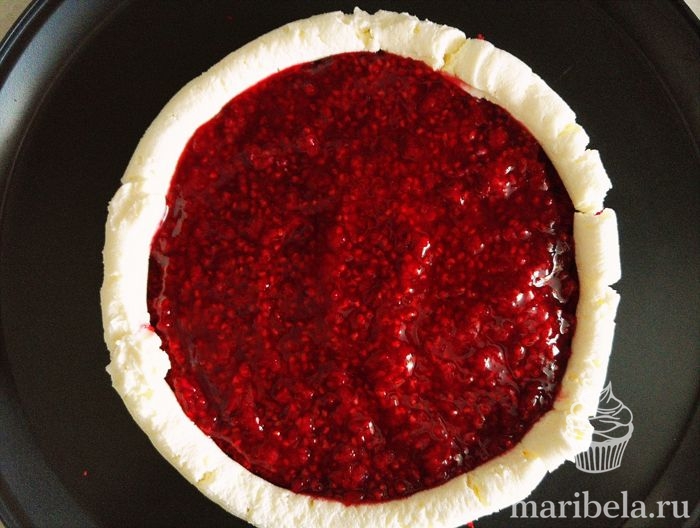
Then, I put the filling into this “well”. I specifically decided to put the filling on the biscuit so that it would give its juices there, since I almost didn’t soak it.
I chose raspberry confiture as the filling. To do this, I took 200 grams of fresh raspberries, 10 grams of water and put them in a saucepan over medium heat and boiled them for a minute or two. Then I added 100 grams of sugar (adjust to your taste) and 8 grams of corn starch. Boil for another three minutes until thickened. Removed from heat and cooled to room temperature. If you want the filling without seeds, then you need to pass the mixture through a sieve. Then the amount of raspberries should be increased.

Place cream on top. Level the surface.
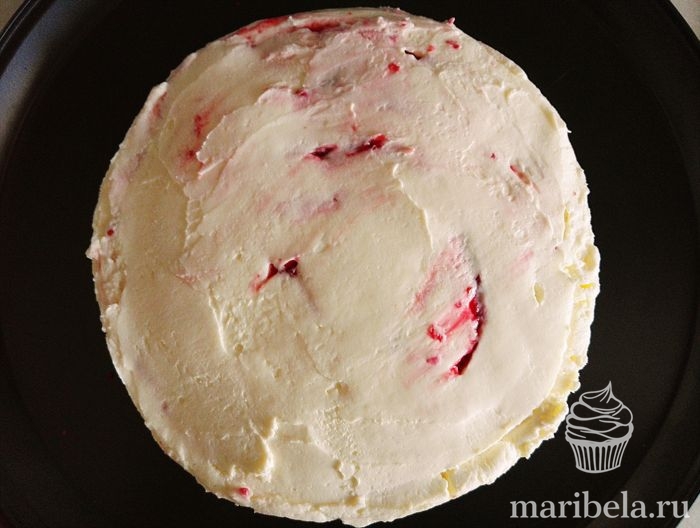
And lay the next cake. So until the end.
Then, immediately apply a rough coating, wrap the cake in film and put on top the ring or mold in which you baked the cake. This is necessary so that the cake takes the correct shape. You can collect it right away in the ring, it doesn’t matter, do what’s most convenient for you.
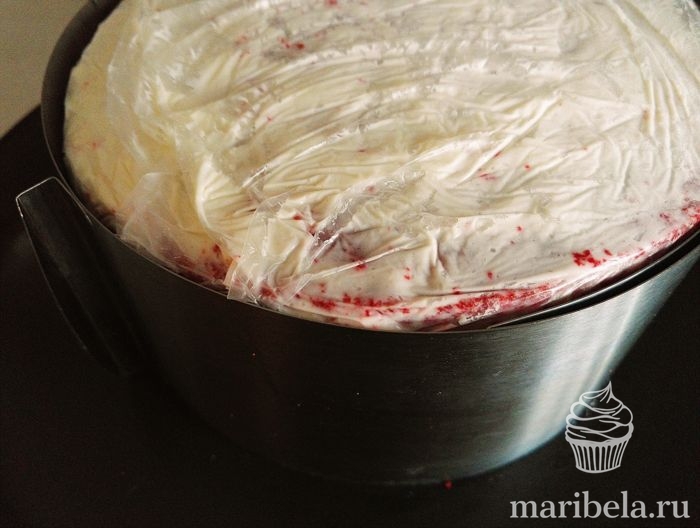
Place the cake in the refrigerator to stabilize. I usually leave it overnight. However, I always recommend waiting a couple of hours before finishing the coating, because otherwise the cake may skewer or cracks may appear in the cream.
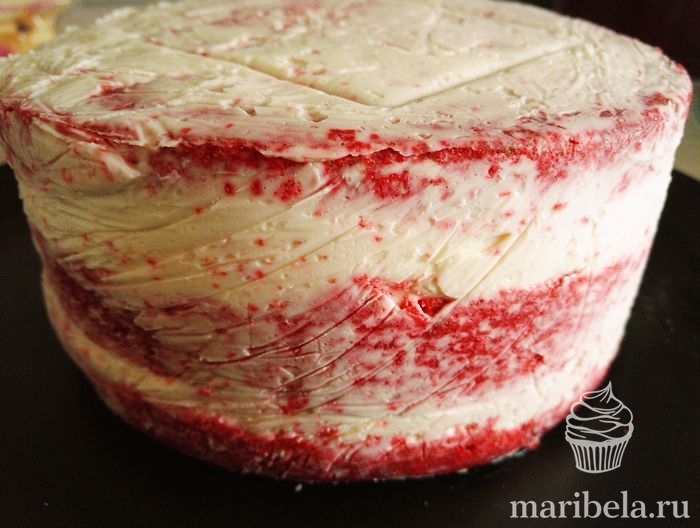
In the morning, remove the ring and level the cake for finishing. Here I used . For a given diameter, you will need 400-500 grams of ready-made coating cream to cover the cake.
For the filling, I would recommend lighter cream-based creams, this or. These are absolutely ideal options. For the layer you need 600 grams of cream. I didn’t have cream on hand, so layering the same with it is also tasty, but more fatty. Thus, we will need about 1 kg of cream for the whole cake.
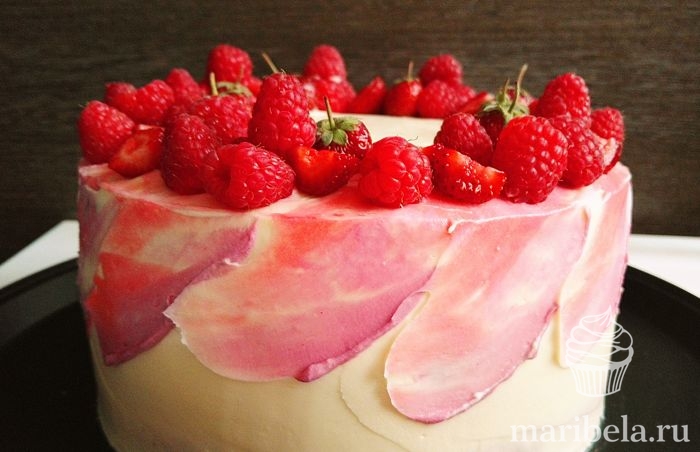
This is the kind of cake I made. I made the strokes on top with the same cream, coloring it with red and turquoise gel dyes.
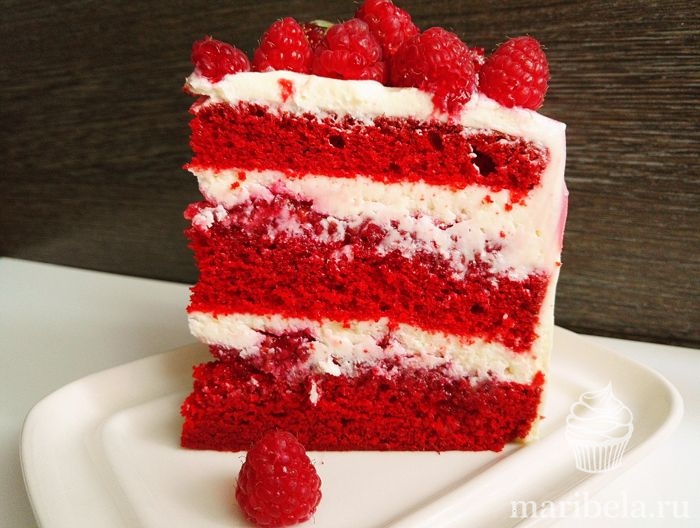
And this is a cut. Wet cakes are indecently red, snow-white cream and berry filling. This cake will not leave anyone indifferent.
If you're looking for a substitute for the "fat" version of vegetable oil-based Red Velvet, then this is the perfect recipe for you.
Be sure to try this cake. I'm sure you'll like it.
Bon appetit.
Red Velvet cake (or Red Velvet) is an exquisite dessert consisting of bright and very catchy cake layers against a background of contrasting snow-white cream. This wonderful pastry comes from the USA, but how, where exactly and under what circumstances the recipe originated is currently unknown. One thing is for sure - this dessert has gained enormous popularity and has become a favorite treat for sweet tooths almost all over the world! This is facilitated not only by the original appearance of the cake, but also by the incomparable taste of moist, porous cakes combined with delicate buttercream!
Today we invite you to make this iconic dessert with your own hands! And if you don’t have time to prepare a whole cake, we recommend trying it - they have a similar taste, but at the same time they are prepared simply and very quickly!
Ingredients based on a mold with a diameter of 20-22 cm: 
For the test:
- eggs - 4 pcs.;
- cocoa powder - 1.5 tbsp. spoons;
- flour - 450 g;
- vegetable oil (refined) - 400 ml;
- kefir - 370 g;
- fine salt - 1/4 teaspoon;
- sugar - 400 g;
- baking powder - 2.5 teaspoons (without a slide);
- baking soda - 1.3 teaspoons (without a slide);
- gel food coloring (red) - 2-3 teaspoons.
For cream:
- cream (33-35%) - 300 g;
- cream cheese (curd) - 400 g;
- powdered sugar - 150 g (or to taste).
Red velvet cake recipe with photos step by step at home
How to make sponge cake for red velvet cake
- Combine all the eggs at once (without dividing into whites and yolks) with sugar and beat with a mixer for about 5 minutes (until a light, thickened mass is obtained).

- Pour baking soda (quicklime) into kefir and stir thoroughly.

- Add gel dye to the fermented milk product, mix until the liquid is uniformly colored bright red. If the shade turns out to be pale, the dosage of dye can be increased slightly.

- Add vegetable oil to the colored kefir. For Red Velvet cake, the oil must be of high quality and refined (odorless and tasteless) so that the finished dessert does not have an unpleasant aftertaste.

- Separately mix and sift flour, cocoa powder and baking powder through a fine sieve, add fine salt.

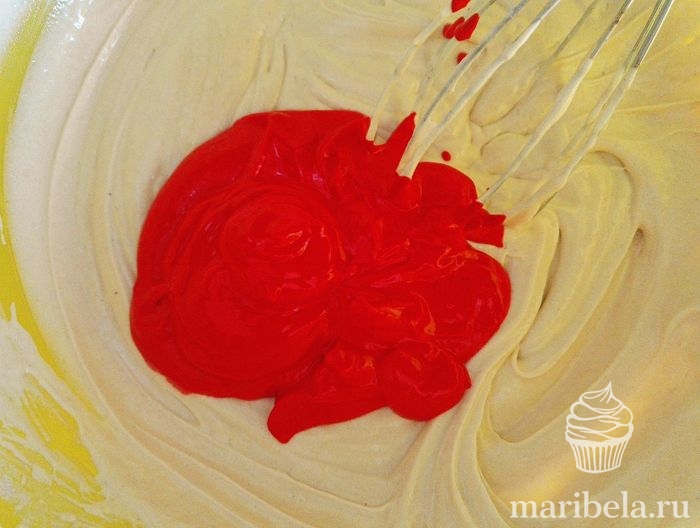
- Pour the dry ingredients into the egg mixture, then pour in the colored mixture of butter and kefir. Beat with a mixer until a homogeneous bright red mixture is obtained without any flour lumps.

- Divide the resulting biscuit dough in half and distribute it into two springform pans with a diameter of 20-22 cm. For convenience, cover the bottom of the pans with parchment (the sides do not need to be greased).

- Bake the sponge cake for the Red Velvet cake for about 30-40 minutes at 180 degrees. We check readiness traditionally by plunging a wooden skewer/toothpick into the dough. If the stick remains dry, remove the pan from the oven.

- After cooling completely, cut the biscuit piece lengthwise into two parts. We do the same with the second sponge cake (in the end we will get 4 red cakes).

How to make red velvet cake cream
- Beat the heavily chilled cream with a mixer until thick.

- In a separate container, mix sweet powder with cream cheese. Lightly beat.

- Gradually add whipped cream to the cream cheese, carefully stirring the mixture with a spoon. Now the snow-white cream for the red velvet cake is ready!

How to form a red velvet cake - step by step recipe with photos
- Place one cake on a plate. In the case of Red Velvet, the sponge cake turns out to be so soft, crumbly and moist that there is no need to soak it with anything additional, so we immediately apply a portion of cream to the base of the cake.

- Distribute the cream layer evenly, and then lay out the next cake layer. Thus, alternating red sponge cake with snow-white cream, we assemble the entire cake. The convex tops of the cakes can be cut off with a knife so that the finished dessert turns out smooth and neat.

- Apply the remaining cream to the very last cake layer, and then level the surface and sides of the cake with the blade of a large knife or a spatula.

- We prepare baked goods in any way. You can prepare an additional portion of cream and decorate the dessert using a culinary bag with a shaped nozzle or use any confectionery toppings, fresh berries, or mint leaves. Before serving, be sure to let the cake sit on the refrigerator shelf for 3-4 hours.

Red Velvet Cake is ready! Enjoy your tea!
We also recommend
 Country pizza with cottage cheese and herbs
 Banana and egg pancakes with flour
 Lazy khachapuri - the most delicious recipes with different cheese fillings Khachapuri with lavash cheese
 Eggplant appetizer for the winter “Ogonyok”
 Pickled apples for the winter Pickled apples with mustard a simple recipe
 Flounder: salting in small-scale quantities using an artisanal method. A way to revive dried flounder at home.